Home / Guides / Capture audio and drag it into any DAW
Capture audio and drag it into any DAW
AudioRoute records whatever is playing on your computer and lets you drag the finished clip straight onto a track in your DAW — Ableton, Logic, Cubase, Pro Tools, FL Studio, Reaper, any of them — or onto the desktop as a WAV. No export, no file-hunting, no routing to set up. This is the universal way to get captured audio into a session; the per-DAW guides cover the alternative live-to-track flow, which differs a little in each host.
Open AudioRoute on the Record tab, hit record while your audio plays, stop, then drag the waveform out of the plug-in onto an audio track in your DAW (or onto Finder / the desktop to save a WAV). Works the same in every DAW.
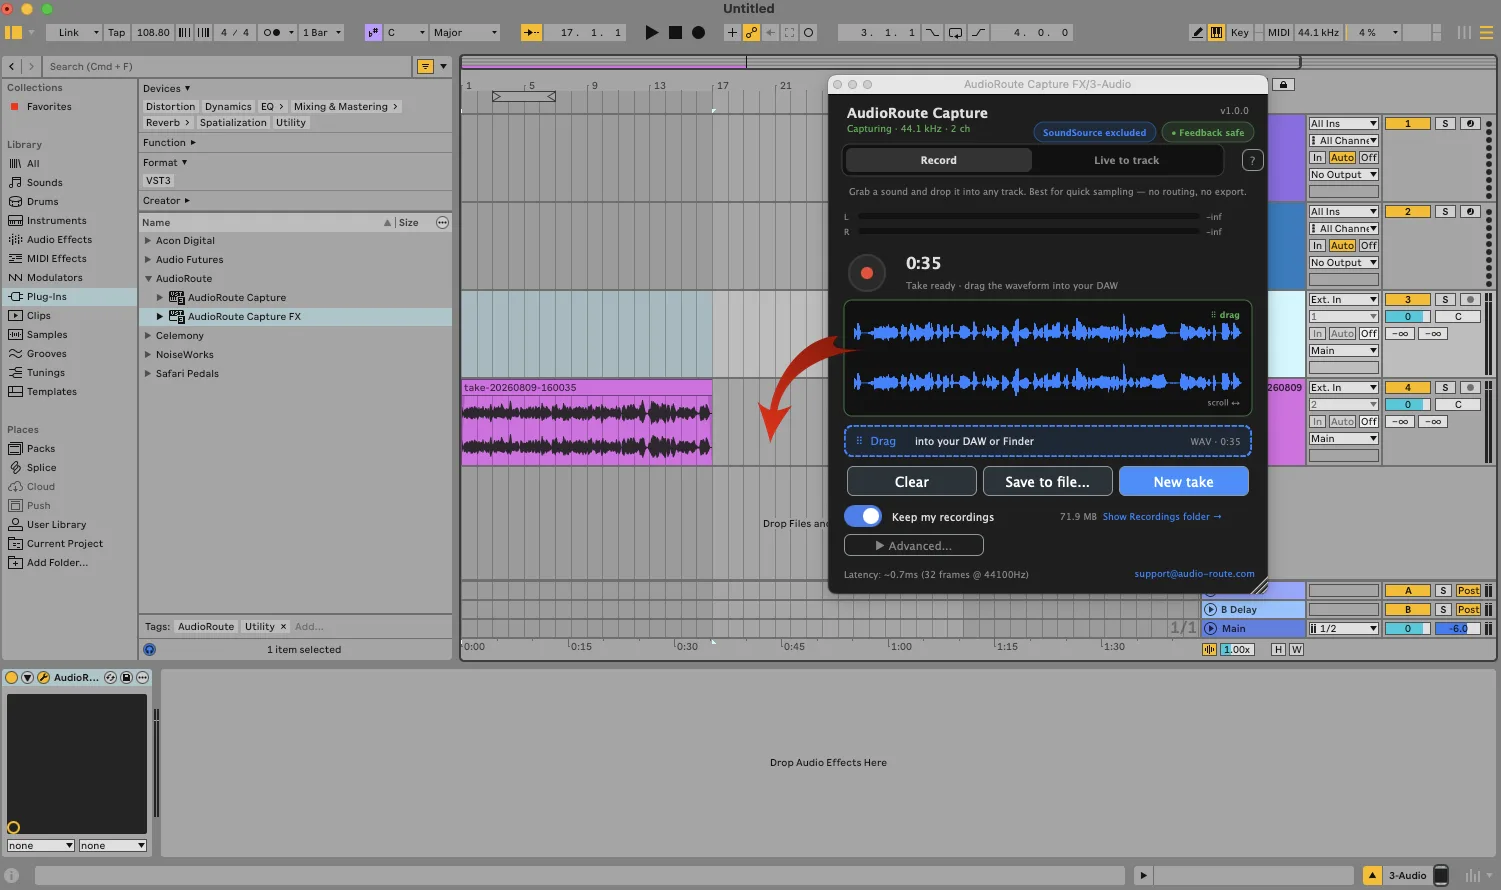
Dragging a captured take from the AudioRoute plug-in straight onto an Ableton Live track.
Why drag-and-drop
Most DAW guides route AudioRoute live onto a track, which is great when you want the capture to land in a specific session in real time. But the fastest, most universal way — and the one that works identically everywhere — is to record the take in AudioRoute and drag it in. There's nothing to route, nothing to arm, and no per-DAW quirks: the moment you drop the clip, it's an audio file on the track, exactly where you dropped it. It's also the cleanest option when you monitor through a Control Room or an ASIO-exclusive interface, since nothing touches your monitoring path.
Step by step
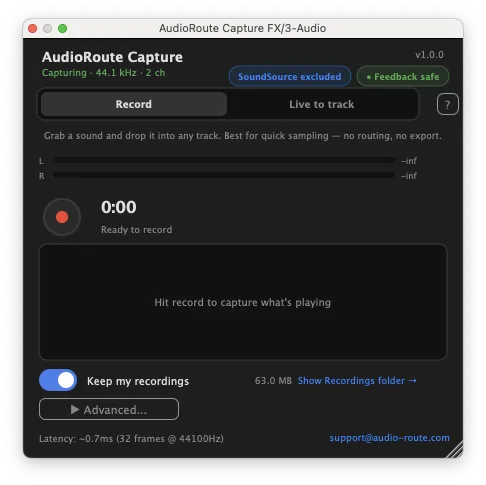
1. Open AudioRoute on the Record tab
Load the AudioRoute Capture plug-in on any track in your DAW and open its window (or use the menu-bar / tray app). Select the Record tab. It's ready to grab whatever is playing — no routing, no export.
2. Play your source
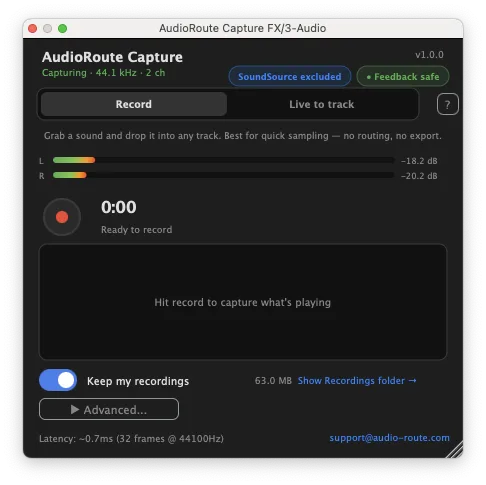
Start the audio you want to capture — a browser tab, a Zoom call, a music app. The level meters move to confirm AudioRoute sees the signal. You don't need to click anything yet.
3. Hit record
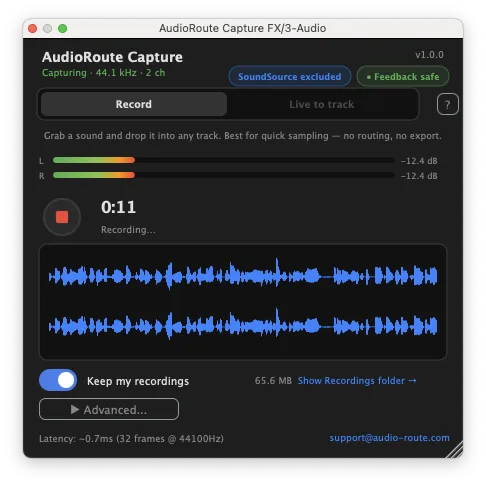
Click the red record button. The waveform draws in real time and the timer counts up. Capture as much as you need.
4. Stop — your take is ready
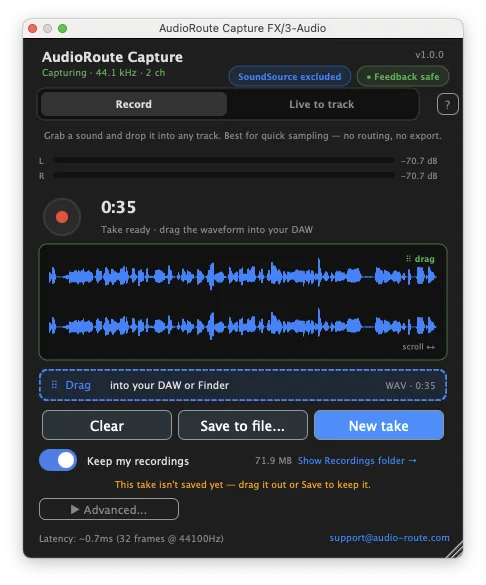
Click stop. The take is ready, shown as a full waveform with a drag handle and Save to file / New take / Clear controls.
5. Drag it onto a track
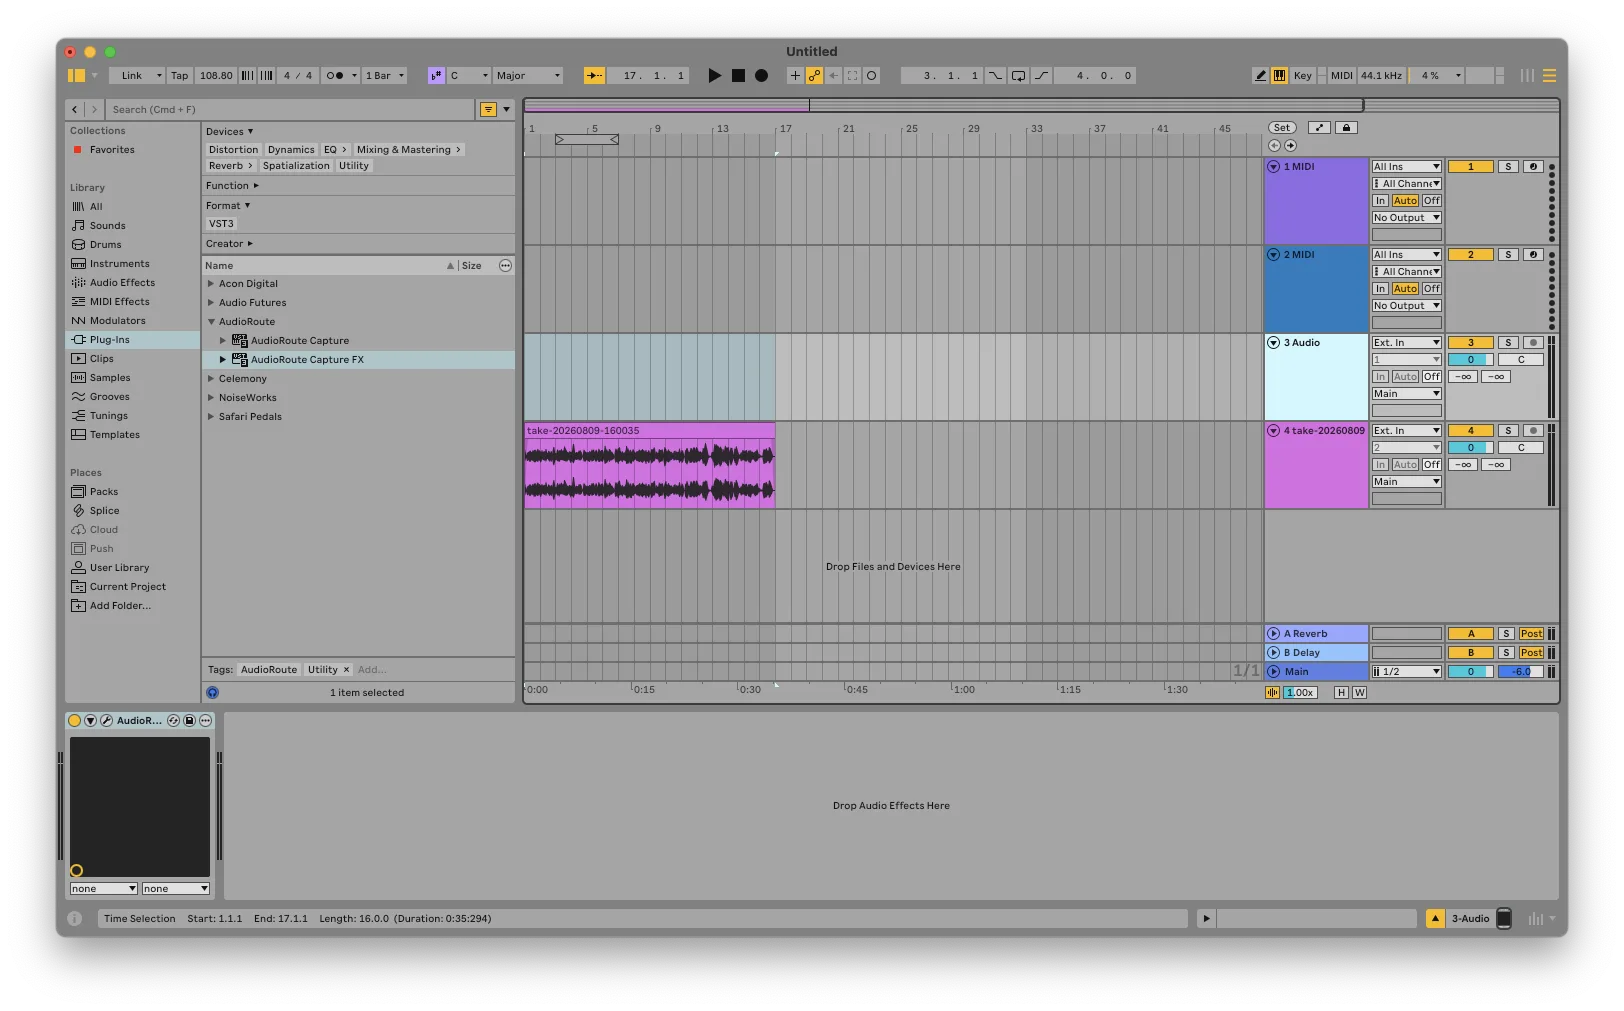
Grab the waveform and drag it straight out of the plug-in onto an audio track in your DAW. Drop it where you want it and it becomes a clip on the timeline — no import dialog, no hunting for a file. Prefer a file instead? Drag it to the desktop or Finder and you get a WAV.
That's it — the clip lands exactly where you dropped it:
Works in every DAW
Because you're dragging a finished clip, this flow is identical in every host — the drop target is just “an audio track.” Use it in Ableton, Logic, Cubase, Pro Tools, FL Studio, Reaper, Studio One, GarageBand, or anywhere that accepts an audio file on a track. For the alternative live-to-track flow (capturing in real time onto an armed track), see your DAW's dedicated guide, since the routing differs per host:
Good to know
- Keep my recordings saves every take as a WAV in your recordings folder, so you can drag the same take again later or grab it from disk. Turn it off if you only want the one you drag out.
- No feedback, no routing. The Record tab captures a parallel copy of what's playing; it never sits in your monitoring path, so there's no double-output and nothing to configure — ideal when you monitor through a Control Room or an ASIO-exclusive interface.
- Drag to Finder works the same way — drop onto the desktop or any folder to get a standard WAV.
Related guides
- Record system audio on Mac (no DAW required)
- Record system audio on Windows (no DAW required)
- Record system audio in Ableton Live — the live-to-track flow.
- Record system audio in Logic Pro
- System audio capture tools compared
Try AudioRoute on your next session
Free 14-day trial, no credit card. €39 lifetime license, all future updates included.
Download AudioRoute View pricing