Home / Guides / Record System Audio on Windows (No DAW)
How to Easily Record System Audio on Windows (No DAW Required)
AudioRoute can capture whatever your PC is playing — a Zoom call, a YouTube video, Spotify, a sample-pack demo, anything — straight to a WAV file. No DAW, no Stereo Mix, no virtual-cable wiring. Five clicks and you've got the file. This guide walks through the full flow, then shows the floating overlay that turns it into one click.
Prefer reading? Skip the video — the full step-by-step is below.
1. Open the AudioRoute tray app
Click the AudioRoute icon in your Windows system tray (bottom-right of the taskbar, next to the clock). If you don't see it, click the ^ chevron to show the hidden-icons flyout — Windows tucks new tray icons in there by default.
Tip: you can drag the AudioRoute icon out of the hidden-icons flyout onto the taskbar so it's always one click away. If the icon isn't there at all, launch AudioRoute from the Start menu — that happens if you've quit the app or enabled On-Demand mode, which doesn't start anything at login.
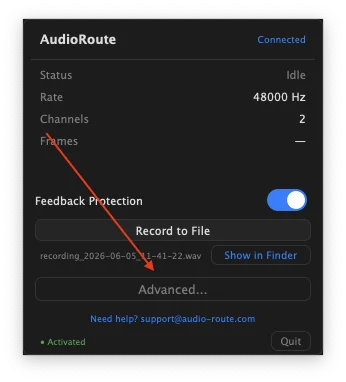
The tray window pops open showing the daemon connection status, current sample rate, channel count, and the record button. If the status reads Connected in the top-right, AudioRoute is ready — you don't need to do anything else to set up.
2. Click Record to File
The Record to File button starts capture immediately. There's no source selection — AudioRoute captures your entire system audio mix automatically.
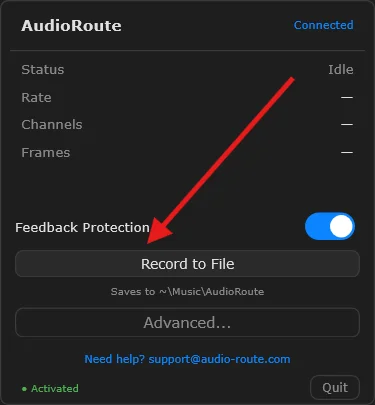
C:\Users\<you>\Music\AudioRoute\.Feedback Protection is on by default. Leave it on. It mutes the audio AudioRoute is capturing from being re-captured into itself, which would otherwise create an infinite-loop feedback. You'll still hear the audio on your speakers as normal — only the capture path is protected.
3. Play whatever you want to record
Once you're recording, AudioRoute captures everything your PC is playing — switch to YouTube, Spotify, your browser, a Zoom call, a Discord voice channel, a sample-pack demo on a website — and it all lands in the file.
The tray window updates to show Capturing status with a live elapsed-time timer, file size, and meter activity.
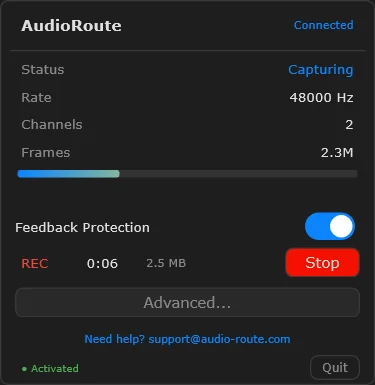
You can close the tray window at this point. Recording continues in the background until you click stop.
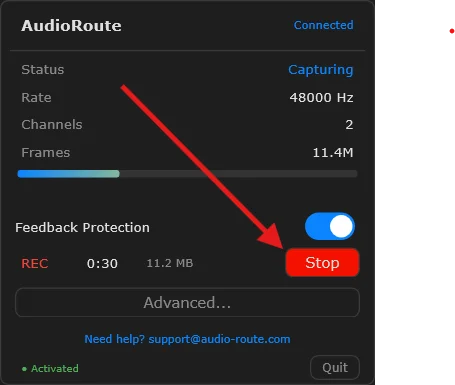
4. Click Stop
Click the red Stop button to end the recording. The file is written and immediately available — no rendering, no export step.
5. Reveal the recording in File Explorer
After stopping, the tray now shows the name of the file you just made — auto-named with a timestamp like recording_2026-06-05_13-29-06.wav. Click the blue button next to it. (It's currently labelled Show in Finder on Windows too — a leftover from the Mac version. It opens File Explorer just fine; the label reads Show in Explorer from the next update.)
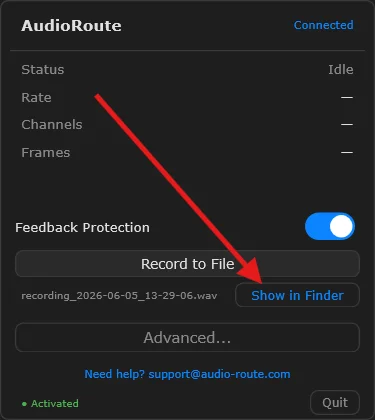
File Explorer opens with the recording pre-selected in C:\Users\<you>\Music\AudioRoute\.

Music\AudioRoute folder, pre-selected and ready to drag anywhere.Drag it into a DAW, drop it into an email, upload it somewhere, or just double-click it to preview in Media Player. It's a standard WAV file — any audio app can open it.
Pro tip: the floating overlay for one-click recording
If you record often, opening the tray every time gets tedious. AudioRoute has a tiny floating overlay window that stays on top of all your other windows, so you can start and stop recording without leaving whatever app you're in.
Enable it once
Open the tray and click Advanced... to expand the settings panel.
Toggle on Show floating overlay.
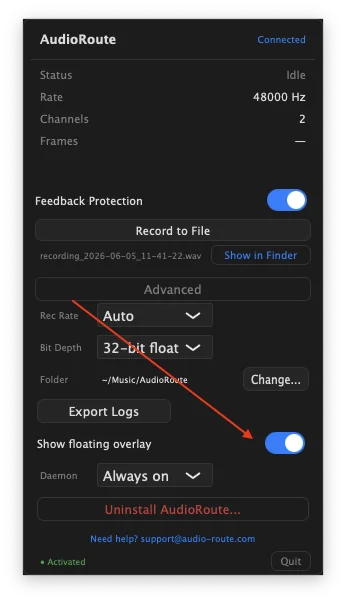
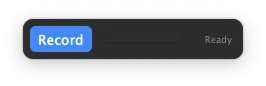
A small overlay window appears, sized just enough for the record button. It floats above all other windows by default.
Use it any time
Click Record on the overlay to start capturing. Same exact behaviour as the tray button, just always accessible.
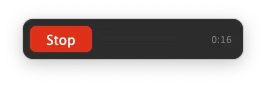
Click Stop on the overlay to finish.
The recording lands in the same place as before — your Music\AudioRoute folder. Open the tray to find the file or reveal it in File Explorer.
Where the recording lives
By default, AudioRoute writes recordings to C:\Users\<you>\Music\AudioRoute\ as WAV files named recording_YYYY-MM-DD_HH-MM-SS.wav. You can change the folder under Advanced → Folder → Change... and the recording format (16-bit PCM or 32-bit float) under Bit Depth.
WAV is universally readable: every DAW (Ableton Live, FL Studio, Reaper, Pro Tools, Cubase, Studio One, Cakewalk) imports it directly. So do Media Player, VLC, Audacity, and every audio editor on the planet. There's nothing to convert.
Heads-up about long recordings. A 30-minute stereo recording at 48 kHz / 16-bit is roughly 330 MB; at 32-bit float it's roughly 660 MB. AudioRoute doesn't currently split or rotate files mid-session, so plan disk space accordingly for very long captures.
Related guides
Recording to a file is the simplest workflow, but it's only one of AudioRoute's three capture paths. The other guides go deeper:
- Stereo Mix not working on Windows 11 — why the old built-in way broke, and every alternative compared.
- Does AudioRoute need an ASIO driver? — short answer: no. Detailed explanation of where ASIO does and doesn't matter, plus the one edge case (ASIO-exclusive sources) and the bridge tools that solve it.
- Record system audio in Ableton Live — live routing as a DAW track, Mac & Windows.
- Record system audio in Reaper — live routing, Mac & Windows.
- Record system audio on Mac (no DAW required) — the Mac version of this guide.
- On-Demand mode — for power users who want zero background services.
For OBS, Audacity, Zoom, Discord, or any other app that accepts an audio input device, point the input at AudioRoute Capture — it appears as a virtual audio device system-wide.
Don't have AudioRoute yet?
Free 14-day trial. No card required, no signup, no watermark on recordings. Just download and go.
Download free trial All guides